I've been asked by several to post instructions on how to make those adorable Tear bears, how to use the tear bear brush and for a pattern to use. So Here we go:
ITEMS NEEDED
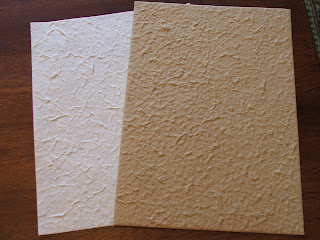
Mulberry paper (handmade paper makes the fuzziest bears!)
Mulberry paper (handmade paper makes the fuzziest bears!)
Black cardstock
Pencil
Tracing paper or you can even use the Spellbinders Oval templates to trace out
your bear with a pencil =D
Cardstock for pattern tracing
Scissors
Glue ( tombo glue works the best and this and it just takes a little)
Chalk
Fluff Brush (you can buy these at Home Depot)
Black pen .005 fine tip
White paint pen (The best is the Uniball Signo white gel pen)
Fine paintbrush or Q-tips or eye shadow applicator ( Dollar stores are cheapest!)
Water
Round or Oval punches (Best is the Friskars oval hand punch)
Foam tape
Prep Patterns:
Cut out patterns and trace them onto chipboard or cardstock using tracing paper. You can enlarge or reduce the patterns to suit your project.
Cut out chipboard/cardstock.
Label the backside of each piece in pencil so you can keep them straight
I keep all my pattern pieces and a picture in a ziplock baggie to help make it quick to find.
Prep Paper:
Trace each pattern piece in pencil on the backside of your paper.
I like to label each piece so I know what piece goes with what bear.
Leave at least 1/3 inch between patterns. This allows more room for tearing & more “fur”. It is much easier to do an entire sheet at one time than it is to do a bear at a time.
Ready For Tearing:
Tip: First it is important for you to know that in order for your bear to be fluffy you need to add more than one layer of Mulberry paper. I layer mine in fours.
Using a paint brush or Q- tip (I use the H2O pen sold at Michaels craft store) thoroughly wet the lines you have traced, making sure the paper is wet through. Begin to go around the outside edge of your traced patterns. I like to go over it once and move on to the next. This will allow the
water to soak in. I usually do 3-4 pieces before going back over them. The outline should be visible from the other side. If you get too much water-don’t panic. It will dry!
Tear It:
Carefully pull the mulberry paper apart along the trace lines. Set piece aside to dry and continue with the rest of your patterns. If you are in a hurry, blow them dry with a hairdryer!
Tear It:
Carefully pull the mulberry paper apart along the trace lines. Set piece aside to dry and continue with the rest of your patterns. If you are in a hurry, blow them dry with a hairdryer!
Now you are ready to fluff ‘em up! Use your “fluff brush” and brush from the center out, working towards the outer edge. Do this on each part of the bear. The fibers will come off on the brush-don’t worry! You can brush side to side or in circles.
Now brush the paper in the opposite direction. When brushing the hair back to it’s original direction work very gently.
Your bear should now be fluffy! Remember to add layers. Also be careful not to brush too much or you will soon run out of paper. You don’t need a lot of pressure on the brush when fluffing.
Stick it:
Trace/punch eyes and noses. Use the Uniball white paint pen to highlight on the black paper. You can also write directly on the dry mulberry paper (eyebrows, mouth, freckles) with your .005 zig pen. Play with your pieces and once you decide how you like it, apply your adhesive. If you are
using separate paws, I suggest waiting to glue them on until you are ready to place them on your scrapbook page. I like to use 3D glue dots for my muzzles to add depth. Apply your face to your bear. For gluing the eyes and noses I use the Glue Dots mini dots
Embellish it:
You are ready for chalk! I like to use a slightly darker color around the edges.The cat's eye Chestnut Roan is one that I like to use. After there is a distinct darker edge, I blend towards the center. You can apply pink on the ears & “blush”. You can even make the paw marks on their feet.
Have fun with them! Apply to your cards or scrapbook pages.Here is a pattern that you can right click and save the picture. Enlarge or make your bear your desired sized and print out.









No comments:
Post a Comment