I was working on a layout last week...the one posted on my blog of the "Buzz Light Year Ranger Spin" and at the time I really wanted a "target sign" to paper piece but ran out of time and just made one out of a journaling card. I finally got around to this today and created this. You can have the star in the middle if you want or just leave out the star since it is separated and I used a 5/8 inch circle punch for the center of the target.. Have fun with it!
Wednesday, August 11, 2010
Circle of Dots Frame Free SVG
I am up tonight scrappin while the boys are sleeping shhhh =D I am doing a layout that I wanted to have dots around my circle svg that I cut out. I was looking for a template so I could use my white sharpie and do it that way but **sigh** found a template that was around 7.00 plus would have to pay shipping. I found out how to do them...mmmm several hours later into this evening ...WOOT! There it is! So now I can either put my mini color sharpies into my pen holder on my cricut and make colored dots or I can cut this out on cardstock and make my template =D Now I can go to sleep...night everyone...thought I would pass this along over to you so your not up late one night lol!
get file here
Punch Storage- Scrappin with my bug
Guess what I will be doing this weekend!!! My punch collection has grown out of my drawer (**thanks Martha Stewart**) Check out the idea that Scrappin with my bug came up with!! This is awesome!
Cuttlebug and Big Bite Sandwich Cheat Sheet
Feel free to Copy and Print these out 
Cuttlebug Sandwich Die Cutting Embossing
| Cuttlebug | Plate A Plate B Die (cut side up) Cardstock Plate B | Plate A Plate B Folder (with cardstock inside) Plate B |
| Nestabilities You will need an embossing mat to emboss,or a plumbers gasket cut to size. | Plate A Plate C Spellbinders Die Cardstock Plate B | Plate A Die with Die cut still in Die Embossing Mat 2-3 Cardstock Shims (try 2 first) Plate B Plate B |
| Sizzix Big Shot | Plate B Cardstock Die (cutting side down) Plate B | Plate A Plate B Folder with Cardstock inside Plate B Cardstock shim |
| Revolution Dies | Plate A Plate C Die Cardstock Plate B | |
| Sizzlits | Plate A Plate B Die Cardstock Plate B | |
| Sizzix Originals & other Steel Dies | Plate B Cardstock Die Plate B | |
| Sizzix Cut N Fold Dies | Plate A Die Cardstock Plate B Chipboard Shim OR TRY Plate B Cardstock Die Chipboard Shim | |
| Simple Impressions | Plate A Plate B Folder (cardstock inside) Plate B OR TRY Plate A Chipboard Shims Folder (cardstock inside) Plate B | |
| Quickcutz Regular and Grand | Plate A Plate B Die Cardstock Plate C | |
| Brass Embossing Stencils | Plate A Plate B Brass Stencil Cardstock Embossing Mat or Plumber’s Gasket Plate B | |
| Texture Plates | Plate A Texture Plate Cardstock Embossing Mat Impressions Pad (sold in Sizzix Texturz Starter Kit) Possible Shim Plate B |
Compliments of Sarah at www.pinkcricut.com
Big Shot Sandwich Die Cutting Embossing
| Spellbinders Dies with Magnetic Placement Pad | Multipurpose Tab 2 Acrylic Mat Magnetic Placement Mat Spellbinders Die Cardstock Acrylic Mat | Multipurpose Tab 1 Acrylic Mat Magnetic Placement Mat Spellbinders Die Cardstock Tan Emboss Mat Possible Cardstock Shim Acrylic Mat |
| Spellbinders Dies w/o Magnetic Placement Pad | Multipurpose Tab 2 Spellbinders Die Cardstock Acrylic Mat Acrylic Mat | Multipurpose Tab 1 Spellbinders Die Cardstock Tan Emboss Mat Tan Emboss Mat Cardstock Shim |
| Cuttlebug | Multipurpose Tab 2 Acrylic Mat Cuttlebug die Cardstock Acrylic mat | Multipurpose Tab 1 Acrylic Mat Cuttlebug Embossing Folder Acrylic Mat |
| Wafer-thin Dies Quickutz | Multipurpose Tab 2 Acrylic Mat Wafer-thin Die Cardstock Acrylic Mat | |
| Metal Stencils | Multipurpose Tab 1 Acrylic Pad Metal Stencil Cardstock Silicone Rubber Impressions Pad | |
| Sizzix Texturz | Multipurpose Tab 1 Texturz Plate Cardstock Silicone Rubber Impressions Pad | |
| Sizzlits | Multipurpose Tab 1 Acrylic Mat Sizzlits Die Cardstock Acrylic Mat | |
| 2.5 inch folders | Multipurpose no tab Acrylic Mat Embossing Folder Acrylic Mat | |
| Embosslits | Multipurpose Tab 1 Acrylic Mat Embosslits Die Cardstock Acrylic Mat | |
| Clearlits | Multipurpose Tab 1 Acrylic Mat Clearlits die Cardstock Acrylic Mat | |
| Simple Impressions | Multipurpose Tab 1 Acrylic Mat Simple Impressions Embossing Folders Acrylic Mat | |
| Sizzix Big Dies | Acrylic Mat Die Cardstock Acrylic Mat | |
| Originals Dies | Acrylic Mat Die Cardstock Acrylic Mat | |
| Movers & Shakers | XL Acrylic Pad Die Cardstock XL acrylic pad |
Creating Text Circles Tutorial
Thanks to Margaret and Nancy, members of the Klic-N-Kut Yahoo group for today’s topic. Margaret first needed to know how to get her text into a perfect circle for her scalloped frame. Then Nancy posted and asked to split the text so that half of it wouldn’t be upside down. The above image shows what I teach in today’s video:
Tuesday, August 10, 2010
Disney Buzz Lightyear Ranger Spin Layout
Another layout done from our Disney World trip we took a few months ago. Here I only had two photos and the main photo of my little guy Jayden was slightly blury and you couldn't even see him behind that Astro Blaster lol! I still wanted to scrap the ride for his scrapbook though since this was a HIGHLIGHT of the park for him. I made up for it with fun embellishments =D
Layout Recipe:
We R Memory: sewn cardstock-blueberry
Jenni Bowlin pattern paper: Sunny Day
Sassafras border stickers- Apple Flag banners
K and Company- Adhesive stickers- Girl Scout
Little Yellow Bicycle - 12 month cards **used one to look like a target** I then used a 1 inch paper punch for the center red target spot
The Buzz lightyear paper piecing I purchased last week on Ebay =D
Back To School Shopping
Took little Jayden school supply shopping...MY FIRST!!!!! (my baby is going into Kindergarten =) whoohoo! Its great to still have 1st time milestones in my life =D
I was so excited to find this at Toys R US for 16.99...on Jayden's supply list they wanted a 18.5 wide box with lid..huh? WELL..it just so happens that this kit is the dimensions they requested AND it included inside all the items on his list he needed except a little eraser (story about this little thing coming), the pocket folder and the hand sanitizer which we found at Walgreen's =D
crayola Ultimate art supply kit that came in a plastic box that looks to be 13.5x8.25x4.75 and what's cool is it came with the blunt scissors, 8 count watercolors set, 8 count washable markers, crayons, 12 count color pencils CHECK then went to Walgreens and bought, poly plastic green folder, small plastic school box, hand sanitizer and the 12 pack #2 pencils and that total was 8 bucks...I'm just missing a darn Staedtler eraser lol!
The Story of the Little Eraser
so I was doing soo great at the savings and the findings taking on the role as 1st time School Supply shopper and THEN.....what HURT....I went to Michaels Craft store AHEM for the little eraser and...and...and...100 bucks later...I couldn't find that little eraser hahahaha! I am blaming Martha Stewart on this....
Poor little Jayden was exhausted after doing his school shopping lol!
Today's Kiddo Menu Breakfast, Lunch, Dinner Recipes
Morning Everyone! Here is our Today's Kiddo menu:
Breakfast: Yogurt with granola and blueberries...wheat germ sneaked in ;D
Morning Snack: fruit bowl of grapes, strawberries and cantaloupe
Lunch: Egg salad sandwich with carrots sticks and vege dip
Dinner: Spicy Moroccan Style Meatballs With Whole Wheat Spaghetti!

Breakfast: Yogurt with granola and blueberries...wheat germ sneaked in ;D
Morning Snack: fruit bowl of grapes, strawberries and cantaloupe
Lunch: Egg salad sandwich with carrots sticks and vege dip
Dinner: Spicy Moroccan Style Meatballs With Whole Wheat Spaghetti!

Ingredients:
Serves 8-10 (3 meatballs each)
For meat balls:
- 500g ground meat
- 500g ground chicken or turkey
- 2 eggs
- 1/2 cup (or more) instant oatmeal (or breadcrumbs)
- 1 large onion
- 1 tblsp of each of the following: paprika,cumin, turmeric, ginger, cinnamon
- 2 tsp salt
- 1/2 cup chopped cilantro or parsley finely chopped(optional)
- optional: you can easily hide a cup of grated zucchini in these meatballs if needed!
- optional: stretch the quantity by adding some grated potato and more oatmeal with another egg.
For Sauce:
- 1 cup tomato paste, or less paste and more tomatoes
- 5-6 cloves garlic chopped
- 1 peeled tomato
- 1 red pepper chopped
- 1 tblsp of each of following: paprika, turmeric, cinnamon
- a dash of salt and pepper
Directions:
Make sauce first, so it has time to cook while you assemble the meatball mixture. Saute garlic and add additional ingredients to pot. Add water to make slightly thick sauce. Bring to boil and simmer, adding more water if necessary
For meat balls, assemble all the ingredients and mix thoroughly, it's easiest to mix with clean hands! You can make this mixture ahead of time and refrigerate for a few hours if necessary. Once sauce has cooked for at least 15-20 minutes start rolling meat balls and placing them into boiling sauce. Cook for one hour, turning if necessary. I recommend using a very wide low pot for this such that the meatballs cook in the pot in one layer. This prevents meatballs from falling apart if for some reason the mixture isn't dense enough, and you'll have a nice thick sauce to serve with the meatballs, rather than having to cook them in a soup like liquid.
These meatballs freeze wonderfully, and this recipe might be enough for two meals depending on the size of your family, and how much of these they gobble up. Plus, they are delicious cold in a sandwich!
Monday, August 9, 2010
Today's Kiddo Menu Breakfast, Lunch, Dinner Recipes
Morning everyone! Here is our kiddo menu for today:
Morning breakfast: Three egg omelet with cheese


Crack the eggs into a bowl. Add a few spoonfuls ofmilk, a generous pinch ofsalt, and some freshly ground pepper. Combine the ingredients with a fork until incorporated and smooth.


Over medium heat, melt a generous pat of butter in the frying pan and swirl it around to evenly coat the sides and bottom. Pour in the egg mixture.


As the eggs start to set, use arubber spatula to gentlypush aside a small patchof cooked egg, then tilt the pan so that uncooked eggfills in the gap. Repeat, working your way around the pan until the eggs have reached the consistency you like.


Sprinkle grated cheeseevenly over the cooked eggs. At this point you can also add any other fillingsyou might want, such as fresh herbs, avocado, smoked salmon, cooked ham,and sun-dried tomatoes, Turn off the burner.


Using the rubber spatula,lift up one edge of the omelet and roll it over itself about one-third of the way. Hold the pan over a plate and let the omeletstart to slide onto it,flipping the pan at the last minute so the omelet folds over itself again.
Lunch: If You Love Pizza, Try it in a Panini!
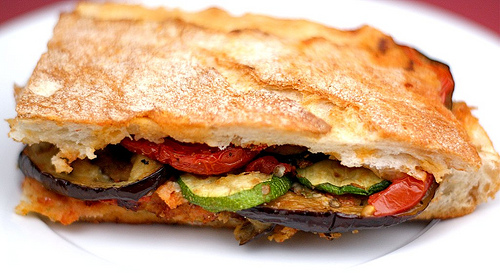
Homemade Pizza Sauce (leftover from pizza night two days ago)
- 1 small yellow onion, chopped
- 2-3 cloves garlic, minced
- Crushed red pepper, to taste
- 1 tsp. fennel
- 1 small can tomato sauce
- 1 can diced tomatoes, drained
- 2 T tomato paste
- Pinch of sugar
- Salt and pepper, to taste
- 1 tsp. dried oregano
- Fresh basil, chopped-to taste
1. In a medium pan add the olive oil. Over medium heat, saute the onion and garlic until tender. Add in the crushed red pepper and fennel. Saute for one minute.
2. Stir in the tomato sauce, diced tomatoes, and tomato paste. Stir well. Season with pinch of sugar, salt, pepper, oregano, and fresh basil. Simmer for 30 minutes.
Then you slather each slice of bread with pizza sauce. Then add mozzarella cheese, roasted vegetables, and fresh basil. Heat up a panini maer and smashed down until the cheese is melted and oozing out the sides. If you don’t have a panini maker don’t worry, you can use two frying pans-one to heat up the sandwich and one to smash it down.
Dinner: Oh So Yummy, Chicken Pesto Pasta
This dish could not be any simpler to make and it is oh so yummy! It has 3 of the best ingredients out there: chicken, pesto, and pasta. Oh wait, don’t forget the parmesan cheese!!
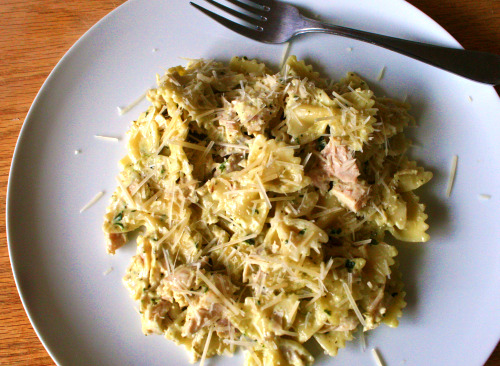
Recipe for Chicken Pesto Pasta – makes 4 servings
- 3/4 cup heavy cream
- 1/4 cup pesto (used the already made from Costco) but down below is how to make it homemade
- 1/4 cup grated parmesan
- salt and pepper to taste
- 1/2 box cooked pasta – we’ve got bowtie
- 3 cups cooked chicken shredded or cubed
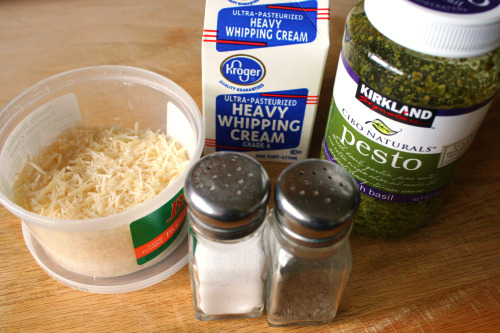
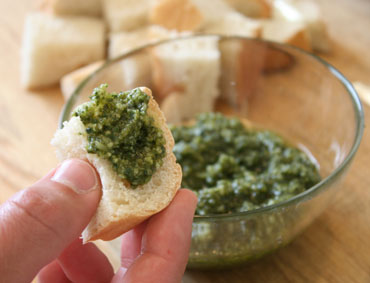
Make Your Own Pesto! With only 4 ingredients, this yummy green sauce is so easy to make. It goes great with pasta, pizza, sandwiches, and is perfect as a dip for a crusty bread.
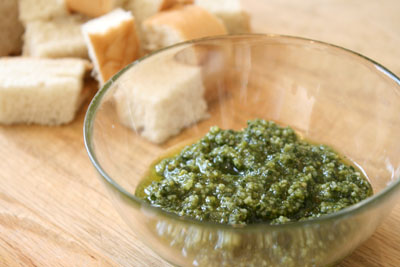
Basil is easy to grow and lots cheaper to grow on your own than buy in the store.
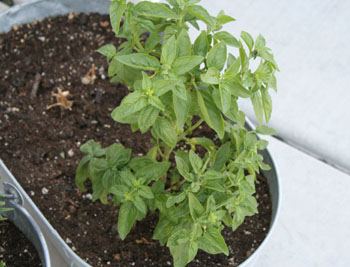
Recipe for Basil Pesto:
- 1 1/2 cup Basil – before chopping
- 3 Tablespoons Pine Nuts
- 1/3 cup Parmesan Cheese
- 1/2 cup Extra Virgin Olive Oil
- Dash of Garlic Salt – optional
There are lots of recipes for pesto and with all kinds of ingredients. This recipe makes one cup of prepared pesto.
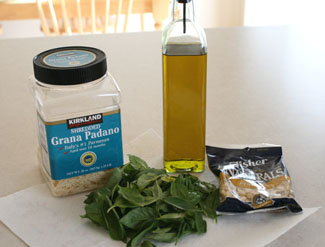
You will need a food chopper of some sort, even a grinding blender should work. I use this mini food processor, it’s small but does the job. For Christmas, I’m finally putting a Food Processor on my list! Add your basil and chop, then your pine nuts, chop. Add Parmesan cheese, dash of garlic and your olive oil, and blend until pureed.
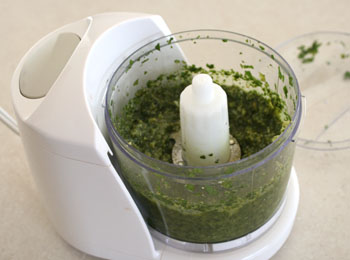
You can have it as chunky or smooth as you like. This was all that my chopper can do, perfect to top on my bread.
Method:
Cook and prep your chicken and pasta to your liking and combine in a bowl. Set aside.
For the sauce, bring your heavy cream to a boil, stirring constantly, it will come to a boil fast. Let this boil on medium heat for 4-5 minutes until it thickens up. Add your pesto and stir. Add your parmesan and stir until most of the cheese is melted in the sauce. Add your salt and pepper, not too much as the pesto and cheese have a lot of flavor by themselves.
Pour your pesto cream sauce over the chicken and pasta, and stir to combine.
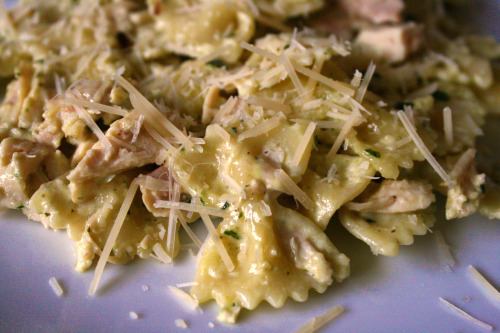
Now it’s ready for dinner. See what I mean, soooooo easy! Just watch, you’ll be adding pesto to everything you make! And cream, and cheese! Thank you to Make and Takes!!!!!!
Subscribe to:
Posts (Atom)


