google search box

Custom Search

Friday, April 29, 2011

Star Wars Little Jedi Birthday Paper pieced Centerpiece

My oldest baby boy is turning 6 next month...I can't believe it! What happened to my 7 pound baby burrito? =D He hasn't seen the Star Wars movie yet or the new Clone Wars movie however....we went to Disney World last year in June and they had the Star Wars event going on there and Jayden met Darth Vader and chewbacca and thought they were the COOLEST!! He couldn't stop talking about the Jedi's and their Light Sabers and that he wanted to be Darth Vader for Halloween lol! So now he wants Star Wars as his theme. I thought I would concentrate more on it being a Star Wars Jedi Academy birthday...I have already set up with an Entertainment company here in Seattle for a Jedi to come teach Jayden and his little brother and friends the "ways of the Jedi" I can't wait teehee! 
Well every Friday our Design team here at Little Scraps of Heaven that I am a proud member of do a challenge. This week our DT member Dawn challenged us to "Make it pop" so I used pop dots on this centerpiece to make it look more 3D on the piecings...I did this with the Star Wars title, the little Jedi and the star ship. The little Jedi I created from using the Little Scraps of Heaven's "Over the Hill Collection" found HERE I used the robe on the grim reaper bear to make my jedi boy. The boy face came from the "Spellbound Wizard's Collection" HERE and I used the little boy peeker. For the party piecings in this centerpiece I created them with the "Party Animal Collection" HERE

The box I found at Target in their party section and it was only 1.99...I used a square foam brick that I purchased at Michaels that fit perfectly inside this box =D


Close up of the Little Jedi paper Piecing 


Stay tuned! My son's party is next month and I will be making more decorations and sharing my party planning with all of you! Hope you will come by and take a peak...Happy Creating!

My New Pazzles Came WHOOHOO! Move over Cricut E =D


WHOOHOO my new love has arrived!!! Meet
the Pazzle Inspiration =D


Check this out...holders for the whatcha ma call its =D The cutter blade holders


Pazzles had such an AMAZING deal right now!
if u go to pazzles.com you will see an ad "how to get ur Pazzles inspiration for 99.00" click on that...its 99.00 and then a 2 year contract for 19.95 a month to their craftroom which has TONS of free cut files...they add more weekly! This is a 600.00 machine =D

the software that comes with this machine does ALL the stuff SCAL does and way more =D  All the svgs and SCAL files can be converted for Pazzles using the free Inkscape program on-line and I can show u how that is done =D The Pazzles uses WPC files and all the paper piecings files u purchase like the ones at Little Scraps of Heaven come with WPC files. When you first install your Pazzle Insiration cd and you run into problems....then try installing the latest adobe reader...on the pop up screen for this software it will have an option to download the latest adobe reader...once i did that...it installed just fine...I ran into problems with this at first=D


Here is how I found out how to convert your svg files to WPC for Pazzle:

  YAY!!!! Found an easy way to convert all your svg files to use on the Pazzle machine...you will need to download an older version of the free software Inkscape 45.1 and you can download that version right   HERE

hen you will want to open this Inkscape program go to "file" then "import" select your svg from your file folder....then go to "file" then "save as" then put dxf.... then open your Pazzle software and open the dxf file and then save as "wpc" whalla!!!! You HAVE to use this older version of Inkscape because the newer version does not save dxf files very well to import

Its a cool thing too that the cutting mats for Pazzle is EXACTLY the same as the Cricut so I can use my newly purchased mat refills that I got for my cricut.

one small downside was that  I found out that the Pazzles software is not a pro version with some of the cool tools =/ if you want the unlimited saves, the rhinestone feature, lattice maker, etc you will need to purchase the Inspiration 
Pro 2010 software for 99.00 sniff sniff
However, it does have tools to draw, distress, pierce, engrave, and emboss which is really COOL!!!!


Tuesday, April 26, 2011

Altered Recipe Book


This is a design project I created for Little Scraps of Heaven Design team using the Mama Mia Pizzeria Collection HERE 
I was soo excited to find this brilliant recipe book at Costco this week only for $11.99 =D
I think decorated it with the paper piecings from this collection. My kitchen is a bistro theme and I thought
this would be a cute idea to put all our family favorite recipes in it. Wouldn't it make a cool gift idea to make these up?

Teapot Card for Mother's Day


Little Scraps of Heaven Design Team member Dawn challenged us to create a monochromatic project this week so I made a teapot card using the Magnolia flower that is in the past freebie section for 1.00 over at Little Scraps of Heaven and you can view it HERE

For the teapot card I purchased a cut file over at Creations by AR and you can take a look 
right HERE

For the Scallop Circle I used a 3 inch scallop punch and then a 2 inch circle punch by Friskars

Friday, April 22, 2011

Easter Baskets for Class Party with Jelly Bean Prayer


Here is the project that I posted over at Little Scraps of Heaven's Design Team blog for Wednesday...As room mom I help plan out my son Jayden's class parties and for the Easter/Resurrection party I got these adorable plastic container baskets and filled them with colored eggs with corresponding colored jelly beans inside. I used the paper piecing from the Jesus Loves Me...you can view it HERE and I found a really neat poem about the meaning of the color of jelly beans that are in the matching colored eggs and the poem reads:

Red is for the blood He gave.

Green is for the grass He made.

Yellow is for the sun so bright.

Orange is for the edge of night.

Black is for the sins we made.

White is for the grace He gave.

Purple is for His hour of sorrow.

Pink is for our new tomorrow.

An egg full of jelly beans, Colorful and Sweet

Is a prayer, a promise, A loved one's treat!!

Charlene Dickensen, 1997


All 22 baskets all in a row =D


Each basket also had a baggie of M&M's a baggie with candies to make an Easter candy bracelet and an attached name tag with a scripture on it. I used my Accent Essentials to make the tag and the mat for my poem card =D

Blessings to all of you this Easter!!!

Tuesday, April 19, 2011

Altered box into a Recipe Box


For this Monday's Design team project for Little Scraps of Heaven I made a recipe box =D I found this cute checked box at a Japanese dollar store in our local mall for only 1.50 and it fits 4x6 cards perfectly! 
Flower ribbon bow: Making Memories Rosettes
Cooking theme stickers: Recollections bought at Michael's
Recipe title was cut out from Printing Press Cricut Cartridge
Baking charms: Karen Foster Design
Paper piecing: Little Scraps of Heaven Designs Cooking up some Fun Collection and you can view it HERE

Friday, April 15, 2011

Dog Treat Bag Project- Little Scraps of Heaven

Welcome to your Friday and our Design Team at Little Scraps of Heaven's 
Friday Challenge!
This challenge was "Playful Paws" we were to chose a LSHD paper piecing that has paws such as a bear, bunny, kitty, dog etc. and there was to be embossing anywhere on your project...either dry or wet embossing. I decided to make a little Doggie Treat bag. I bought a treat bag at Michael's craft store with the circle window on it for around 1.50 and then I took a sheet of pattern paper from Imaginisce Just Imagine stripes to adhere as the background. I then used a 3 inch scallop circle punch on some blue cardstock paper. The blue cardstock paper I embossed with circles and adding a little glitter to the embossed dots. I used two other circle punches in two different sizes to create the red circle border around the window. For the stickers I used Recollections Dog stickers and Jolee's by you Doggie Treats dimensional stickers.

Paper piecing of the Doggie is from the Little Scraps of Heaven "Twitterpated Collection" HERE

Wednesday, April 13, 2011

Pizza Night Digital Layout


I saw this Digital kit over at Gotta pixel and thought it was just 
PERFECT with this Little Scraps of Heaven chef with the pizza. I had to 
"scrap lift" one of their example layouts and then put my own little twist to it and also add my digital paper piecing. Perfect for the picture I wanted to use =D Here is the kit if you would like to take a look: HERE
For the paper piecing I used Little Scraps of Heaven Design's the "Mama Mia Pizzeria Collection" and you can view that collection HERE


Friday, April 8, 2011

Cooking Up Something Good Layout


This Friday's Little Scraps of Heaven Design Team's challenge was to
"Make a Scene" using one of LSHD paper piecings. For this
layout I used the "Cooking up something Fun" you can view
this collection HERE


Happy Creating!

Thursday, April 7, 2011

Tear Bear Instructions and Pattern

I've been asked by several to post instructions on how to make those adorable Tear bears, how to use the tear bear brush and for a pattern to use. So Here we go: 

ITEMS NEEDED

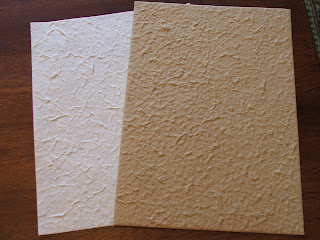
Mulberry paper (handmade paper makes the fuzziest bears!) 


Black cardstock

Pencil
Tracing paper or you can even use the Spellbinders Oval templates to trace out
your bear with a pencil =D


Cardstock for pattern tracing

Scissors

Glue ( tombo glue works the best and this and it just takes a little) 

Chalk

Fluff Brush (you can buy these at Home Depot)

Black pen .005 fine tip

White paint pen (The best is the Uniball Signo white gel pen)

Fine paintbrush or Q-tips or eye shadow applicator ( Dollar stores are cheapest!)

Water

Round or Oval punches (Best is the Friskars oval hand punch)

Foam tape


Prep Patterns:


 Cut out patterns and trace them onto chipboard or cardstock using tracing paper. You can enlarge or reduce the patterns to suit your project.
 Cut out chipboard/cardstock.
 Label the backside of each piece in pencil so you can keep them straight
 I keep all my pattern pieces and a picture in a ziplock baggie to help make it quick to find.


Prep Paper:

 Trace each pattern piece in pencil on the backside of your paper.
 I like to label each piece so I know what piece goes with what bear.
 Leave at least 1/3 inch between patterns. This allows more room for tearing & more “fur”.  It is much easier to do an entire sheet at one time than it is to do a bear at a time.

 Ready For Tearing:

Tip: First it is important for you to know that in order for your bear to be fluffy you need to add 
more than one layer of Mulberry paper. I layer mine in fours.

Using a paint brush or Q- tip (I use the H2O pen sold at Michaels craft store)   thoroughly wet the lines you have traced, making sure the paper is wet through.  Begin to go around the outside edge of your traced patterns. I like to go over it once and move on to the next. This will allow the 
water to soak in. I usually do 3-4 pieces before going back over them. The outline should be visible from the other side. If you get too much water-don’t panic. It will dry!

Tear It:

Carefully pull the mulberry paper apart along the trace lines. Set piece aside to dry and continue with the rest of your patterns. 
If you are in a hurry, blow them dry with a hairdryer! 

Now you are ready to fluff ‘em up! Use your “fluff brush” and brush from the center out, working  towards the outer edge. Do this on each part of the bear. The fibers will come off on the brush-don’t worry! You can brush side to side or in circles.


Now brush the paper in the opposite direction. When brushing the hair back to it’s original direction work very gently.
Your bear should now be fluffy! Remember to add layers. Also be careful not to brush too much or you will soon run out of paper. You don’t need a lot of pressure on the brush when fluffing.

Stick it:

Trace/punch eyes and noses. Use the Uniball white paint pen to highlight on the black paper. You can also write directly on the dry mulberry paper (eyebrows, mouth, freckles) with your .005 zig pen. Play with your pieces and once you decide how you like it, apply your adhesive. If you are
using separate paws, I suggest waiting to glue them on until you are ready to place them on your scrapbook page. I like to use 3D glue dots for my muzzles to add depth. 
Apply your face to your bear.  For gluing the eyes and noses I use the Glue Dots mini dots


Embellish it:


You are ready for chalk! I like to use a slightly darker color around the edges.The cat's eye Chestnut Roan is one that I like to use. After there is a distinct darker edge, I blend towards the center. You can apply pink on the ears & “blush”. You can even make the paw marks on their feet. 


Have fun with them! Apply to your cards or scrapbook pages.Here is a pattern that you can right click and save the picture. Enlarge or make your bear your desired sized and print out.


Wednesday, April 6, 2011

Humpty Dumpty Layout


Here is my show and tell for Wednesday night's Little Scraps of Heaven Design Team blog =D

Here are the materials for this layout:

Pattern Papers: Made by Piggy Tales "Humpty Dumpty" collection. I LOVE
this company's papers =D
The green textured paper for the grass I found at Joann's craft store
Flowers: Prima and HOTP chocolate flowers
The vines used was a cut from the cartridge "Storybook"
Paper piecings: Little Scraps of Heaven "Nursery Rhyme Collection Humpty Dumpty" found HERE

Happy Creating!

Monday, April 4, 2011

Digital Scrapbooking Basics #2 Tutorial Using Digital Templates

I was asked to show, step by step, how to create a digital scrapbooking layout using a Digital Layout Template. The cool thing about digital templates is that they are designed by experienced scrapbookers and you can add multiply photos in different sizes and its all nicely laid out. Once you learn how it will be easy to make a nice layout that put together well, very quickly. I will be demonstrating this tutorial in  Photoshop Elements again and for those who are using the regular Photoshop it will be the same steps and for those who are using Paint Shop Pro will have to use their method of cutting and copying backgrounds out of a shape and Digital Image Pro users will have to use the fill with photo method. Perhaps, another day I'll demonstrate those as well. 

The layout template that I am going to use for this tutorial looks like this:


I will be using digital papers and embellishments that I found as freebies
and you can download them too:
found a cute kit: HERE

Ok so now I have opened up my Photoshop Elements and have created a new 
12x12 white background with 300 dpi....I open the file with this unzipped template we just downloaded and I use the move tool to drag it from the "photo bin" onto my white blank background.

Photoshop automatically creates a new layer and so if you look in the layer palette (at the right hand corner), you will see the original white background layer and the template layer. The template layer is highlighted, indicating that this layer is active. If you are using Paint Shop Pro, you have to copy and paste your template into your new document. Digital Image Pro users don't do it this way at all, but they use the Insert File from computer command to get the template into their layout.

The next thing I am going to work on is creating a layout background with some Easter pattern paper so I am choosing two papers from this kit:


and


Using the move tool, I slide the paper on top of my layout like a curtain =D You can grab the selection marks and stretch it out to cover the whole template on your layout. 

so now my layout template is  UNDERNEATH the paper that I want to cut out. If you will look at your layer's palette. You will see the template shape and see that it is underneath the paper

To cut it out, I am going to use the keyboard shortcut Ctrl + G (Mac users use Command + G). Hit the two keys at the same time. This works for both Photoshop and Photoshop Elements. If you happen to have Photoshop CS2, though, you have to hit Ctrl + Alt + G at the same time, as Adobe changed the command slightly. Another way to do it is use the "long way" which is to go to Layer > Create Clipping Mask.


Now I'm going to add my pictures of my boys doing their egg hunt. So what I do after I have opened all the pictures I want to use on my layout...they will be shown in the "photo bin" at the bottom. Selecting the "move tool" take your mouse and grab one of the pictures and drag it over the mat again like a curtain covering it up...


we are going to do the same action as before shortcut Ctrl + G

So after I have done each photo mat the same way adding my photo and then punching it out like a paper punch =D with Ctrl + G I added my title using a font I had installed on Photoshop Elements and these paper piecings from Little Scraps of Heaven

Bunny pulling a basket: HERE
Bunny with basket is from the Easter bunny collection: HERE

The digital eggs and flowers came with this free kit mentioned at the beginning of this post. So here is my finished digital layout:


Saturday, April 2, 2011

Digital Scrapbooking Basics #1Tutorial

ok everyone...I was going to walk you through part 1 of digital scrapbooking =D If you want to go along with me I am going to use this free Digital Disney paper kit that you can download right here: http://noreimerreason.com/?p=1562 ...I have photoshop elements and will walk you through that program.

opening the digital file: Once you have downloaded your zip file and have extracted it to a designated folder....open your photoshop elements and select NEW--->BLANK FILE then a window will pop up to give your layout a file name...and to enter size so go ahead and put width as 12 inches and height 12 inches...make sure your resolution field has (300) pixels...RGB Color and background white...


On the left side of your screen in Photoshop you’ll see a set of icons. Each of these represents a tool available to you in PSE. This section is referred to as the Tools Palette. On the right side of the screen is the Layers Palette. At the top of the screen is your main menu (File, Edit, etc.) and just below it is the Options Toolbar.

NOTE CLICK ON THE SCREEN IMAGES TO MAKE BIGGER FOR VIEWING =D

now with our blank canvas go to OPEN and go to your designated folder with the kit...I am using the yellow paper as the first file I 
am opening for the background on my layout. Go ahead and also choose the other papers from the kit. 


You will notice at the bottom of your screen is the "photo bin" and there is all the opened papers there.


So now with my blank white "New Untitled Document" I am going to take my mouse and click on the yellow paper in my photo bin and drag it right onto the white untiled document.

So now I have this on my Untiled page...go ahead and "Save As" and create a file name for your new digital layout.


I just opened a photo of my boys with Mickey that I will be using along with the "png"file of Little Scraps of Heavens bear with Mickey hat

Now I want to add some of the pattern papers onto my layout and cut them into strips to lay across the layout.  I am going to use the grunge black paper first as my mat for the border strips. So go to your photo bin and click on this black paper.

Go to your "crop tool" shown on the left side where the "tools palette" is  
and cut a section out of this paper.


Click back on our yellow background layout we are working on and down in my "photo bin" it shows the strip of the paper I just cropped...I took my mouse and clicked on it in the bin and dragged it onto my 12x12 yellow background...


sometimes you may not see what you just dragged onto your layout...it may be hidden behind the yellow paper so if you look to your right in the "layers palette" you will see that you did put it there and it is a layer. Click on that strip in the layers palette...it will show in your 12x12 background a dashed outline of where its hiding =D This dashed line indicating where the edges of the photo are. This is called the bounding box.


Right click your mouse and a little window pops up choose the "bring to front" and there it is =D 

Now let's go to the striped red and black pattern paper and we are going to cut a 12" strip of it...using your crop tool...lets cut it out like this


I then used my mouse to rotate my strip so that it lays across the middle of my paper...


I went ahead and cropped some more 12 inch strips of the other papers in this free kit and rotated them and now it looks like this =D


If everyone is still with me..I will go ahead and put a frame, my picture, the piecing and some elements to dress up the page =D

Ok so now I had open my picture of my boys I wanted to use in my "photo bin" and I just used my mouse to drag it onto my 12x12 background that i am working on in photoshop elements. Again I had to look to the right in my "layers palette" to see that my picture I dragged was there because it was hiding on my layout...so I clicked on the picture in the layers palette and it showed a dotted outline of where its hiding...I right click my mouse and "bring to front" =D 


I then added the journaling tag in this kit and the frame over my picture sizing it to fit. The "lets remember the magic" was also free in this kit and I just dragged it on my journaling tag and sized it to fit. I found some cute elements in another free kit that you can download here: http://www.4shared.com/file/k7LjTn7x/Jamie_Dell_Scraps_Kit_All_Ears.html


The paper piecing is the "finished piecing png" file that comes as a file along with the cutting files purchased in this set. The set is from Little Scrap of Heaven "Clubhouse Gang Collection" and you can find it HERE


Now that you have finished your digital layout  a good website to print your finished 12x12 digital layouts with excellent quality and 5.00 flat rate shipping and a cost of 1.99 per 12x12 take a look here:

Also Costcophotocenter.com take a look at their site HERE now prints 12x12 scrapbook layouts and it is 2.99 per page =D some Costco stores do this too so check with on near you.


NOTE: Prior to printing your page, you’ll want to save a flattened version. Go to Layer-> Flatten Image. Flattening the image combines all your layers into one.